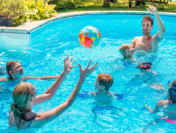
Memorial Day is considered the kickoff to the summer swimming season, which means that now is the perfect time to get your backyard pool ready. Opening a swimming pool for the summer season can be a simple process for any do-it-yourselfer, regardless of whether you have an in-ground or above-ground pool. Not only will you save yourself hundreds of dollars, but you won’t have to wait for a pool service company to fit you into their schedule. Once you are sure temperatures will stay above freezing, just follow these 10 easy steps and you’ll be relaxing poolside with friends and family in about two weeks!

Step 1: Drain water from the pool cover
If you have a solid pool cover, the first thing you need to do is to remove any standing water. A submersible pool cover pump will greatly speed up this process. Skip this step if you have a mesh pool cover.
Step 2: Remove leaves and debris
Invest the time in cleaning as much debris as you can from the cover using a brush, leaf net or blower. The last thing you want is to have any accumulated dirt, leaves or branches fall into your pool when you remove the cover. Be sure to leave the pool cover in place until after you have adjusted the water level and chemistry.
Step 3: Raise the water level
Since pools typically lose water during the winter, use your garden hose to bring the water level in the pool to its normal height.
Step 4: Test the water chemistry
 Testing the chemistry of your pool water for pH, alkalinity, bromine and chlorine is an important step for a clean and safe swimming environment. Do-it-yourself pool and spa test kits that use test strips make water testing easy and accurate. Look for models with digital and automated color matching readouts for best results.
Ideal levels should be: pH 7.2 to 7.6; total alkalinity 80 to 120 ppm (parts per million); bromine 2.0 to 6.0 ppm; chlorine 1.0 to 3.0 ppm; and calcium hardness from 150 to 250 ppm.
Step 5: Adjust and balance chemicals
Based on the analysis you get back, you’ll need to add certain chemicals to ensure that the water safe and comfortable for swimming. Pool chemicals can be purchased at swimming pool supply stores, many hardware or home and garden stores or online. These include:
- Soda ash to increase pH:
- Muriatic acid or sodium bisulfate to decrease pH;
- Calcium chloride to adjust calcium hardness; and
- Cyanuric acid to inhibit the sun’s ability to burn off chlorine.
Be sure to run the circulation and filtration system continuously, 24 hours a day. The filter should be cleaned daily and you may have to add more chlorine.
Step 6: Remove and store the pool cover
Once the water is clear, you can remove the pool cover. It typically takes about a week after adding the chemicals until you will be able to see the pool floor. Carefully lift off the pool cover (this job is best done by two people or more), lay it somewhere flat and brush off any remaining dust and debris. Let the cover air dry, then sprinkle it with talcum powder to prevent mold and mildew. Fold the cover loosely and store it in a dry place for the season.
Step 7: Vacuum the pool
 Once the pool water is clear enough to see the bottom, you can vacuum the dirt and debris. Consider investing in an automatic pool cleaner to eliminate the chore of manually vacuuming. These robotic cleaning machines roam the floor of the pool, scrubbing and sucking up dirt and debris. Look for self-contained models that don’t require a hose, booster pump or pool filter system connection.
Step 8: Skim the surface
Use a long-handled skimmer net to remove floating bugs, leaves and twigs from the pool’s surface.
Step 9: Inspect pool safety equipment
Check with your local building and code department to make sure you are in compliance with your municipality’s swimming pool safety laws. Many towns have swimming pool safety laws that require or recommend:
- A pool fence at least four feet high around pool and spa areas;
- A self-closing, self-latching gate with a pool gate alarm like the MagnaLatch ALERT Pool Safety Gate Latch with Alarm. This easy-to-install magnetic latch offers another layer of protection with an alarm that has dual electric warnings when unlatched: bright LED lights and an audible alarm;
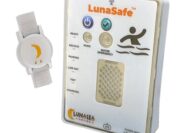
- A pool alarm for your inground or above ground pool that sounds an alarm when a child, pet or non-swimmer falls or jumps into water.
Step 10: Ongoing maintenance
Once the pool opening job is complete, you will need to address a few ongoing maintenance tasks to keep your pool sparkling clean all summer long:
- Check and clean the filter;
- Vacuum the pool bottom at least once a week;
- Add water as needed using a garden hose or a pool water leveler that turns on automatically to fill your pool as water levels decrease;
- Test the water chemistry every 2-3 days.
Avoid Taking Shortcuts
It is essential to complete all of the steps in the DIY pool opening process in order to ensure a safe and healthy swimming environment for you, your family and guests. Now that you know how easy it is to prep your pool for summer, you will never again have to spend the money or waste time waiting for someone else to do it for you. And if you have questions or are looking for the ideal pool products to help you do the job right, DIYcontrols.com is just a click or call away!